NEWS TAG
brand
How To Strip Raised Access Floor?
Raised access floors play a crucial role in modern buildings, providing a flexible and efficient solution for housing electrical, data, and mechanical services. However, over time, the need may arise to strip and reconfigure these floors due to changes in technology, maintenance requirements, or design alterations. Stripping a raised access floor involves carefully dismantling and removing the floor panels while ensuring the integrity of the underlying services. In this article, we will provide a step-by-step guide on how to strip a raised access floor effectively and safely.

Step 1: Preparation
Before starting the stripping process, it is important to gather the necessary tools and equipment. Here is a list of items you will need:
l Safety goggles
l Gloves
l Dust mask
l Pry bar or crowbar
l Hammer
l Vacuum cleaner or broom
l Trash bags or disposal containers
l Cleaning solution
l Scrub brush or floor scrubber
l Mop and bucket
l Floor sealer (if applicable)
l Ensure that the work area is clear of any obstacles and that you have sufficient lighting to carry out the task effectively.
Step 2: Safety Measures
Before beginning the stripping process, it is important to take the following safety precautions:
l Obtain the necessary permits and approvals, ensuring compliance with local building codes and regulations.
l Notify and coordinate with relevant stakeholders, such as building management, facilities personnel, and IT teams.
l Conduct a thorough risk assessment to identify potential hazards and implement appropriate safety measures.
l Ensure the availability of personal protective equipment (PPE), including safety goggles, gloves, and dust masks.
Step 3: Document and Plan
Proper documentation and planning are crucial to ensure a smooth stripping process. Follow these steps:
l Create a detailed floor plan, marking the locations of electrical, data, and mechanical services.
l Document the existing configuration, including cable routes, power distribution, and any specific requirements.
l Identify the sections or areas of the raised access floor that need to be stripped.
l Establish a clear timeline and sequence of tasks to minimize disruption to ongoing operations.
Step 4: Clear the Work Area
Before stripping the raised access floor, clear the work area to ensure a safe and organized environment:
l Remove any furniture, equipment, or obstacles that may hinder access to the floor panels.
l Disconnect all electrical and data connections associated with the floor panels.
l Securely store removed components and label them for easy identification during reassembly.
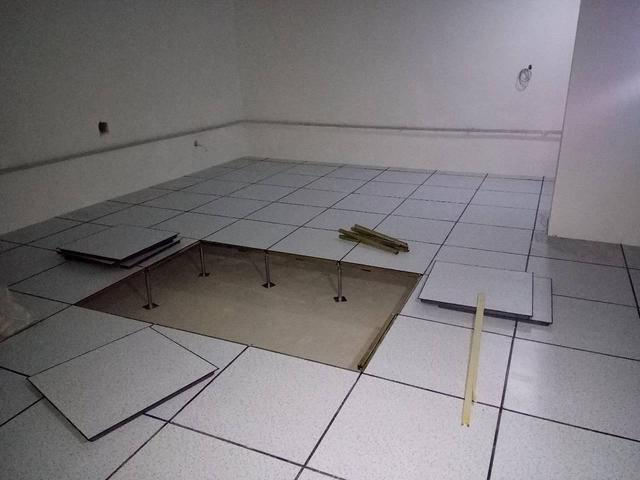
Step 5: Panel Removal
The process of removing the raised access floor panels requires precision and care:
l Identify the access points or lift-up locations on the access floor panels, typically marked by arrows or symbols.
l Starting from one end of the designated area, lift the access panel using a panel lifter or suitable tool.
l Place the removed panel in a safe location, ensuring it is not damaged or subjected to excessive weight or stress.
l Repeat the process for each subsequent panel until the entire area is cleared.
Step 6: Cable and Service Management
l During the stripping process, it is essential to manage the cables and services effectively:
l Inspect the cables for any signs of damage or wear and replace as necessary.
l Organize and secure the cables using appropriate cable management systems, such as trays or conduits.
l Ensure that the services are correctly labeled and documented for easy identification during reinstallation.
Step 7: Cleaning and Maintenance
Once the raised access floor panels are removed, it is an ideal time to perform cleaning and maintenance tasks:
l Remove dust, debris, and any accumulated dirt from the floor void using a vacuum cleaner or suitable cleaning equipment.
l Inspect the subfloor for any signs of damage, corrosion, or water ingress. Address any issues promptly.
l Conduct routine maintenance on mechanical or electrical equipment located beneath the raised access floor.
Step 8: Reassembly and Testing
After completing the necessary cleaning and maintenance, it's time to reassemble and test the raised access floor:
l Start by carefully aligning the floor panels, ensuring a proper fit and functionality.
l Reconnect the electrical and data connections, following the documented configuration and safety guidelines.
l Test all services to ensure they are functioning correctly and address any issues promptly.
l Conduct a final inspection to verify the integrity and safety of the reassembled raised access floor.
Stripping a raised access floor requires careful planning, meticulous execution, and adherence to safety guidelines. By following the step-by-step guide outlined in this article, you can effectively strip and reconfigure your raised access floor while ensuring the integrity and functionality of the underlying services. Remember to consult with professionals or seek expert assistance if you encounter complex technical challenges during the process.
