NEWS TAG
brand
How To Build A Raised Floor Over Concrete Slab? Detailed Access Floor (False Floor) Installation Guide
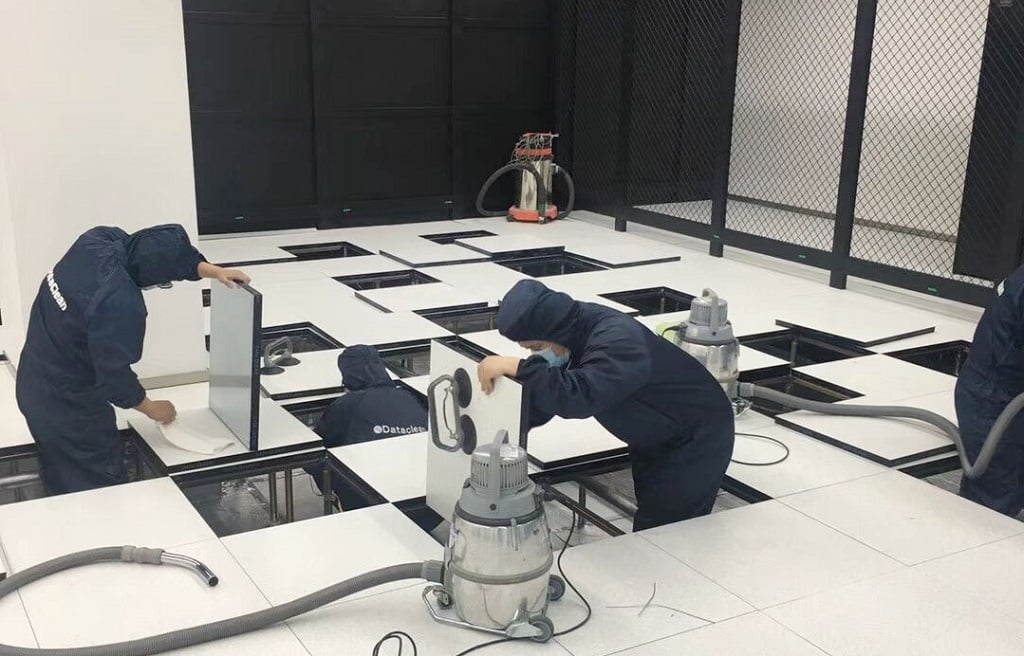
How to build access floors over concrete slabs? In this Access Floor Installation Guide, we will show you how to install raised floors on the concrete, covering the preparing works you should do, the elevated floor accessories and tools that you will need, along with some steps that can help to guide you.

Raised floors are systems indicated for environments where there is a complex electrical and telecommunications infrastructure, such as offices of enterprises. The Access Floor solution consists of the panels fixed directly on pedestals, thus creating voids between the substrate (concrete slab) and the floor. The objects through these underfloor spaces are electrical conductors, data cables, piping, and even air conditioning installations. By providing flexibility, the raised floor system also facilitates the maintenance activities of this entire network.
How To Install A Raised Access Floor Over Concrete Slab?
To ensure the benefits of this raised flooring system, it is critical to follow the correct installation guide and procedure, which begins with the preparation of the executive project. Planning should include information on the pagination of boards and pedestals, level quotas, cuts, details, notes, and so on. The executive design, prepared in format, should consider data on the panels, height, finishes, and level of loads to be supported. Follow us to learn how to install a durable access floor system for your project!
1. Choose The Best Right Raised Floor System For Your Project
Raised Floor Panel Materials and Applications
Consider the application and environment firstly. The different environment has different demands, especially outdoor and indoor areas. So choose the right panel for your access floor system. The access floor can be divided into many types according to the raw materials, covering laminate flooring, hardwood floor, bamboo floor, ceramic floor, all-steel access floor, concrete access floor, aluminum access floor, calcium sulfate floor, etc. Some floors consist of multiple materials. Generally, hardwood flooring is more common in home decoration and all steel raised floor is widely used in computer rooms or data centers. If your floor will be installed in a high moisture environment, concrete or ceramic floor is an ideal choice. You need to choose the material you like, healthy, and ideal for your room firstly. You can check how to choose the right or best raised floor tiles on our Raised Access Floor Selection Guide.
As a technical product, the raised floor accepts only panel coverings approved by the manufacturers. Among the most used Raised Floor Finishes are porcelain, granite, HPL, Anti-Static PVC. However, some solutions are not indicated, such as blanket carpet, as it will prevent the removal of the plates and will cause the solution to losing its main feature, mobility. However, there are hundreds of carpet tiles that can be used on raised floors.

Height Of Access Floor Pedestal
What is the standard height of Raised Floor? In general, the standard height of Raised Floor solutions ranges from 5cm to 2m. However, there is not a fixed standard for installing the raised floors, the variations happen according to the need of each project. Some projects, especially those retrofit areas that have very low ceilings, do not allow high heights for access flooring. For these cases, systems with the finished height from 5 cm are used. In conventional offices, the height usually used ranges from 15 to 25 cm, which allows the use of cable trays under the floor. Anyway, you must make sure that there's enough volume within the plenum to deal with the UFAD HVAC, fiber-optic cables, plumbing, electrical wiring, further as flood and disaster protection measures.

2. Preparation For Building Raised Floor
There is a wide list of raised floor accessories and access floor install tools used during the installation, including access floor suction cup panel lifters, rubber hammer, metal or plastic spatula, laser level, tape measure, stylus, jigsaw, marble saw, bow saw, cup saw, professional drill, screwdriver, powder level tapping line, level hose, and aluminum ruler. Workers should wear appropriate personal protective equipment (PPE) such as safety glasses, hearing protectors, safety boots, cloth gloves, helmets and dust, and gas masks.
With all the equipment properly ready, the preparation of the subfloor begins. The surface that will receive the solution must be fixed and regular. It must be 100% level and regular, free of cracks, ripples, fragmentation, depressions, debris, and moisture. The leveling of the pedestals prevents the system from becoming uneven, causing future problems in installing partitions or equipment on the raised floor.
The execution of the raised floor should only occur after the completion of the other stages of the work, such as ceiling and wall painting. The place also needs to be swept or washed, free of debris or other objects that disrupt the work.
3. Build Access Floors In Steps
1)The installation of the raised floor begins with the markings that indicate the level points, measured every 5 m linear. During this procedure, discount for door sill leveling or predefined installation level in the design must be considered. For example, if the reference level is 100 cm and the installation level is 15 cm, all markings must be discounted to 85 cm, resulting in a 15 cm height installation point.
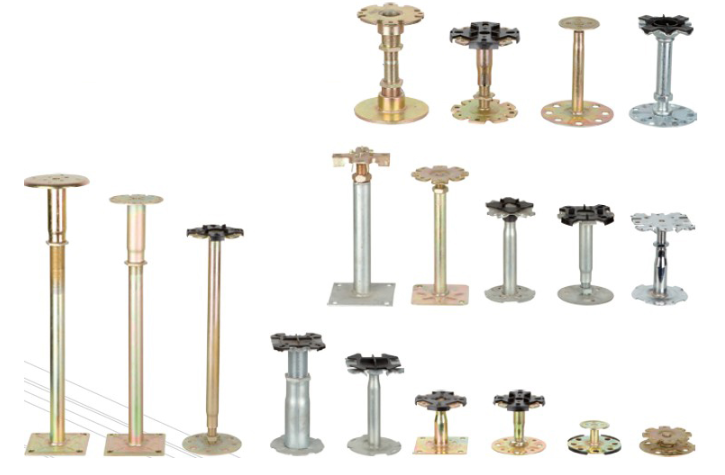
2)For mounting the adjustable access floor pedestal set, the rigid PVC pipes are cut using the jigsaw to fit the correct dimensions, considering the height of the raised floor installation. When the ideal sizes are reached, the tubes are fitted to the threads by tapping with the rubber hammer. Once ready, the adjustable pedestal set is fitted to the raised floor plate with preset height. The number of pedestals should be proportional to the need for product application.
3)Using a spatula, brush or applicator tube, low VOC adhesives are applied to the base of all pedestals. The first false floor panel is positioned at the starting point informed in the installation layout. The next pieces will be positioned with a maximum distance of 5 m from the first, always keeping careful that the elevated floor remains regular. A nylon line can be attached to ensure leveling. The movable wood jig is designed to check the leveling of the boards across the board surface under the leveling line.
4)The raised floor rows are always mounted parallel to the initial one. For each new plate sequence, the nylon line leveling and jig technique should be used. This ensures that the entire sequential assembly will have the same leveling as the initial plates. If the false floor is used with stringers, it is necessary to screw them on the pedestals before placing the panels.
4. Interference In The Environment During Installing Access Floors
Installation work may encounter constructive interference, such as ducts, pipes, or steps, which make the system difficult to perform. To avoid obstacles, it is most recommended that, before installation, the guardians make markings on the subfloor indicating the position of the pedestals. From this information, the designers of the other elements can make their installations without worrying about future interference, as long as they faithfully follow the indications in the subfloor.
When cracks are required in the raised floor installation, these areas are left for the final stage of the procedure. The distances for marking are measured, and the cuts of the plates are made with the perimeter finishing jigsaw. The assembly of the cut-out plates is performed using the finishing pedestals, according to the local situation, noting that the assembly of the plate and small cuttings fillets are done with a superb screw thread.
5. Errors Should Avoid In Installation Of False Floors
The main installation error occurs while leveling the pedestals. Most of the time, the false floor is irregular, and it is necessary to use the adjustment of the pedestals to correct this difference. If the procedure is not performed, the raised floor will reflect on its surface the unevenness in the subfloor.
Problems related to faulty pipe cutting, sharp edges, and too much or wrong adhesive placement are also common. To avoid these and other problems, we need to use appropriate equipment, doing training and constant recycling of installation labor. Normally, the installation service is provided through partners approved by the system manufacturers.
